Introduction
AstCTI is a robust Computer Telephony Integration (CTI) server designed specifically for Asterisk or FreePBX environments. It abstracts the low-level complexities of Asterisk’s ARI (Asterisk REST Interface) and AMI (Asterisk Manager Interface) to monitor agent extensions, manage call controls, and handle queue states. Furthermore, it exposes clean, developer-friendly XML API, REST, and WebSocket interfaces for frontend application development.
AstCTI has been recently updated to support a comprehensive suite of contact center functions:
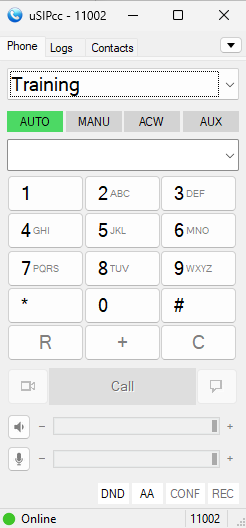
- Integration with uSIPcc to provide contact center features tailored for Asterisk and FreePBX.
- Login: Log an agent into one or more queues simultaneously. AstCTI fully supports multi-queue agent log-ins.
- Logout: Log an agent out of a specific queue or all active queues.
- SetState: Update agent queue states (such as AUTO, MANUAL, ACW, and AUX) alongside designated reason codes.
- QueryAgentState: Query the current state of an agent.
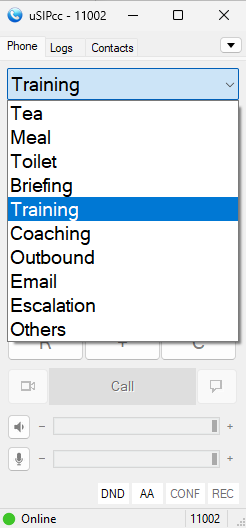
- ListAUXReasonCode: Retrieve all AUX reason codes configured within AstCTI.
- ListACWReasonCode: Retrieve all ACW reason codes configured within AstCTI.
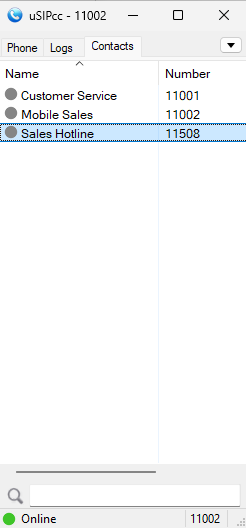
- ListSpeedDial: Fetch the global speed dial directory (numbers and names) defined in AstCTI.
- StartMonitor: Begin real-time monitoring of an agent extension.
- StopMonitor: Cease monitoring of an agent extension.
- MakeCall: Originate an outbound call.
- Hangup: Terminate an active call.
- Hold: Place an active call on hold.
- Consultation: Initiate a consultation call.
- Reconnect: Cancel a consultation call and return to the primary line.
- Transfer: Execute a blind transfer or complete a consultative transfer.
- Conference: Execute a blind conference or complete a consultative conference.
- Retrieve: Retrieve a call from hold.
- Snapshot: Request a complete state snapshot of a device.
- SplitSkillStatus: Provide real-time status and telemetry for agent queues and skills.
Preparation and Password Encryption
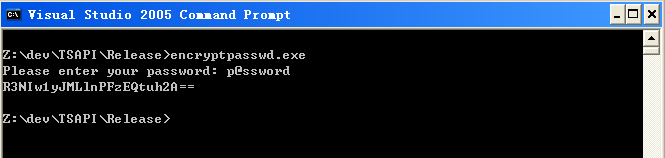
The Access MDB file stores the AMI and ARI username and password required to communicate with the Asterisk server. For security reasons, a utility named encryptpasswd.exe is provided to generate an encrypted version of your password for software installation and configuration.
Instructions:
- Execute the utility to generate an encrypted string for your Asterisk AMI and ARI user passwords.

- Copy the resulting encrypted strings for the acti_ami_01 and acti_ari_01 configuration parameters.
- Execute the tcpgate console command setup to configure the program parameters.
- Example: The plaintext password p@ssword encrypts to R3NIw1yJMLlnPFzEQtuh2A==.
64 bit Windows System Configuration
When deploying on a 64-bit Windows system, please follow these setup steps:
- Configure ODBC DSN: Set up your ODBC System DSN using the 64-bit ODBC Administrator utility located at C:\Windows\System32\odbcad32.exe. (Note: This is required to ensure compatibility with 64-bit Access/MDB database drivers).
- Configure Windows Firewall: Configure the Windows Firewall (which is enabled by default) to ensure that TCP port 14021 is explicitly opened, as this port is required for application communication.
Installation
- Download the AstCTI zip file here.
- Follow the installation steps below to install the software.
- Extract all the files into directory c:\program files\AstCTI
- Open Windows Command Prompt, enter the following commands to register the program as Windows Service
- cd c:\program files\AstCTI
- AstCTI -i
- Open ODBC Setting, create a System DSN called ASTCTICFG for Microsoft Access Driver and point to astcti.mdb which is located in the directory c:\program files\AstCTI
- Start the Windows Service AstCTI
- Telnet to localhost and port number 14021, enter username tcpgate and password tcpgate01 to access the program console
- Enter the command setup to configure the program parameters
- Enter the following command to add extension and monitored by AstCTI
- add extension 101 PJSIP
- Hint: add extension 101 and monitored by AstCTI
- Hint: extension 101 is using technology PJSIP, you can use technology SIP
- Enter the following command in the program console, you will receive debug information
- trace on asc
- Enter the following command in the program console, you will get the help message
- help
Add Asterisk REST Interface User
- The following screenshot is for FreePBX only
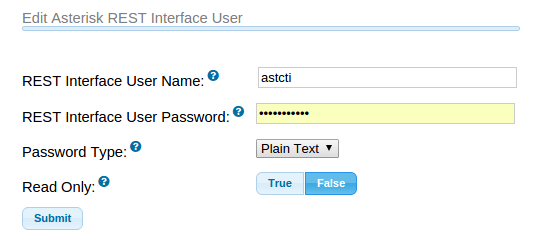

REST Interface
- Enter the following command in the program console to add an REST interface port
- add tcp 9001 * * custom astctirest
- ACD Login
- ACD Logout
- ACD SetState
- QueryAgentState
- MakeCall
- Hangup
- Hold
- Retrieve
- Transfer
- Conference
- Consultation
- Reconnect
- Alternate
- Answer
- DTMF
- UserData
- Snapshot
- SplitSkillStatus
XML API Interface
- Enter the following command in the program console to add an ActiveX interface port
- add tcp 9002 * * custom astctiapi
WebSocket Interface
- Enter the following command in the program console to add a WebSocket interface port
- add tcp 9003 * * custom astctiws
- WebSocket interface accepts JSON request, returns JSON response and delivers unsolicited JSON events
- The JSON strings for MakeCall request and response are
- {id: “1”, request: “makecall”, extension: “101”, destination: “102”, data: “hello”}
- {msgtype: “response”, id: “1”, result: “success”, channel: {name: “channelname”, id: “channelid”}}
- The JSON strings for Hold call request and response are
- The JSON strings for Retrieve call request and response are
- The JSON strings for Hangup call request and response are
- {id: “2”, request: “hangup”, extension: “101”, data: “world”}
- {msgtype: “response”, id: “2”, result: “success”, channel: {name: “channelname”, id: “channelid”}}
- The JSON strings for Answer call request and response are
- The JSON strings for Consultation call request and response are
- The JSON strings for Reconnect call request and response are
- The JSON strings for Alternate call request and response are
- The JSON strings for Transfer call request and response are
- The JSON strings for Conference call request and response are
- The JSON strings to send DTMF request and response are
- The JSON strings for ACD Login request and response are
- The JSON strings for ACD Logout request and response are
- The JSON strings for ACD SetState request and response are
- The JSON strings for StartMonitor extension
- {id: “15”, request: “startmonitor”, extension: “101”}
- {msgtype: “response”, id: “15”, result: “success”, error: “”}
- The JSON strings for StopMonitor extension
- {id: “16”, request: “stopmonitor”, extension: “101”}
- {msgtype: “response”, id: “16”, result: “success”, error: “”}
- The JSON strings for Alert UserData request and response are
- The JSON strings for Hangup UserData request and response are
- Please refer this post for JSON events
Uninstallation
- Stop the Window Service AstCTI
- Open Windows Command Prompt, enter the following commands to uninstall the program from Windows Service
- cd c:\program files\AstCTI
- AstCTI -u
Support and License
- Please contact upinget.com for support and license

