Introduction
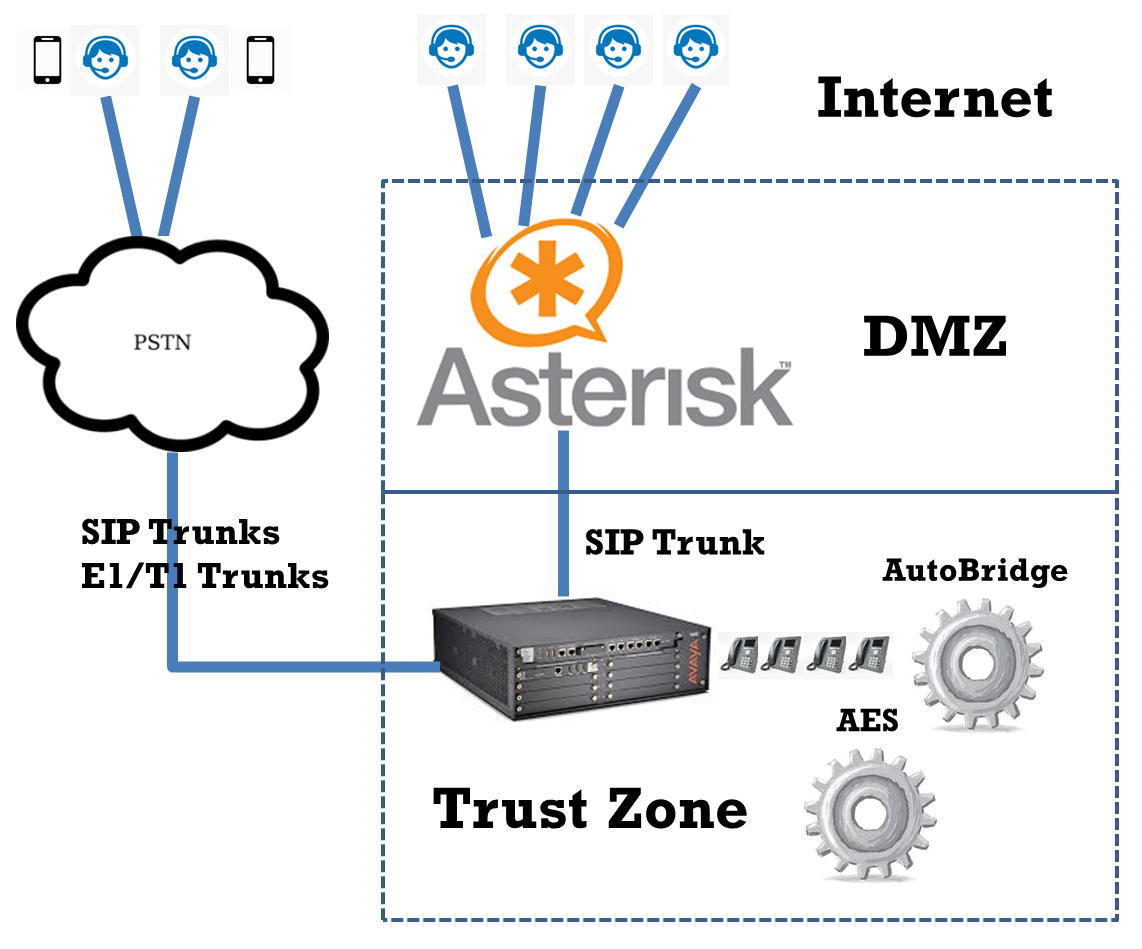
The AutoBridge enables Home Agent solution for Avaya contact center. The tool monitors a pool of Avaya extensions in the contact center, it bridges Avaya and Asterisk extension/Mobile phone together whenever any of the Avaya extension has incoming or outgoing call. This enables home agent who is work from home can operate his/her CRM application via a VPN connection and speak to his/her customer using an Internet SIP phone/Mobile phone.
If you are using SIP phone, this solution required SIP trunks setup between the Avaya and Asterisk. Home agent using SIP phone (a hard SIP phone is preferred for better voice quality and easy of control) to connect to the Asterisk over the Internet. When the home agent login to ACD using his/her CRM application, the AutoBridge knows which Asterisk extension to be bridged with the Avaya extension that the agent is engaging in a call. The AutoBridge protects your existing Avaya investment, no modification of your CTI or CRM is required to implement the Home Agent solution.
On the agent side, please enable Auto Answer on your Mobile phone or SIP phone in order to make the bridge connection much faster.
See Also: AutoBridge for 911 Emergency Call
See Also: AutoBridge Supports Database Logging
Benefits
- Centralized management of agent side numbers
- PSTN/Mobile number and Asterisk SIP phones are supported
- License cost is much lower
About AutoBridge Softphone

The AutoBridge Softphone enables agents to login or logoff ACD using browser from their home/company provided computer. Also, it provides call control functions for agents to communicate with their customers and the support departments over the Avaya trunks and company numbers.
- Login/Logoff
After enter the valid agent id, password and press the Login button, the AutoBridge selects one available station from the pool and performs the ACD login for the agent. The default work mode of the login is AUX state. Agent can change his state to Auto, Manual, ACW or AUX mode. For the AUX mode, agent can also specify AUX reason by select the reason description from drop down Reason Code menu. If agent press the Logout button, the AutoBridge then logoff the agent from ACD and release the station to the pool.
- Call Control
Since the AutoBridge connects the agent station and agent’s mobile/SIP phone by conference call, it can only provide limited call control functions for the agent. If the agent is engaging in a call, he/she can blind transfer/conference by clicking the Transfer or Conference button after he/she enters the telephone number or selects the speed dial number from the drop down Speed Dial menu. If the agent is not engaging in a call, he/she can make call to a customer by entering the telephone number and click the Call button. He can drop the call by clicking the Hangup button after conversation is finished.
Testing using Docker Image
Please follow this guide to test AutoBridge using Docker Container.
Windows Preparation and Password Encryption
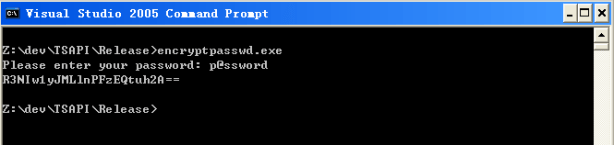
- An access MDB file which stored the CT username and password of AE server. For security reason, a tool called encryptpasswd.exe is provided to generate encrypted password for the installation and configuration of the software
- Execute the program, generate the encrypted passwords for the CT user of AE server, then paste the encrypted password to parameter ab_tlink. For example, the encrypted password for “p@ssword” is “R3NIw1yJMLlnPFzEQtuh2A==”
Windows 64 bit System
- For 64 bit Windows system, please follow the steps below
- Configure ODBC System DSN using 32 bit version of ODBC Admin tool.
C:WindowsSysWOW64odbcad32.exe
- Configure ODBC System DSN using 32 bit version of ODBC Admin tool.
Windows Installation
- Download the TSAPI client for Windows 32-bit from Avaya web site, it contains the library files. You need to register DevConnect before you can access the download page.
- Download the AutoBridge zip file here.
- Follow the steps below to install the software.
- Extract all the files into directory c:\program files\autobridge
- Open Windows Command Prompt, enter the following commands to register the program as Windows Service
- cd c:\program files\autobridge
- AutoBridge -i
- sc description AutoBridge “Provides simple WFH functionss for Avaya CM”
- Open ODBC Setting, create System DSN called AUTOBRIDGECFG for Microsoft Access Driver and point to autobridge.mdb which is located in the directory c:\program files\autobridge
- Open the Access file, edit the value of parameters ab_tlink_01 and ab_tlink_02 to the TLINK of your AES servers in the tParameter table
- Start the Windows Service AutoBridge
- Telnet to localhost and port number 14022, enter username tcpgate and password tcpgate01 to access the program console
- Enter the following command in the program console to add extensions
- add extension 61101
- Hint: 61101 is agent extension
- Enter the following command in the program console to add ACD monitoring
- add acd 51101
- Hint: 51101 is ACD
- Enter the following command in the program console to add phantom devices
- add phantom 41101
- Hint: 41101 is phantom device
- Enter the following command in the program console to add mapping between Avaya and Asterisk extension
- add autobridge 10001 4511001
- Hint: 10001 is Avaya extension, 4511001 is dialing string from Avaya to the Asterisk extension
- Enter the following command in the program console, you will receive debug information
- trace on asc
- Enter the following command in the program console, you will get the help message
- help
RedHat/CentOS 7.x Installation Guide


- The following is for RedHat/CentOS 7 (64 bit only), other Linux distributions are not supported
- Avaya provides only 32bit version of TSAPI SDK, the AutoBridge executable is also a 32bit application
- Login as root and execute the following commands
-
yum update
-
reboot
- Install the MySQL 8.x
-
sudo rpm -Uvh https://dev.mysql.com/get/mysql80-community-release-el7-1.noarch.rpm sudo yum --enablerepo=mysql80-community install mysql-community-server sudo service mysqld start grep "A temporary password" /var/log/mysqld.log mysql_secure_installation - Install the following packages
-
yum install glibc.i686 libstdc++.i686 expat.i686 unixODBC.i686 openssl-libs.i686 telnet wget telnet
-
wget https://dev.mysql.com/get/Downloads/Connector-ODBC/8.0/mysql-connector-odbc-setup-8.0.22-1.el7.i686.rpm
wget https://dev.mysql.com/get/Downloads/Connector-ODBC/8.0/mysql-connector-odbc-8.0.22-1.el7.i686.rpm
yum install mysql-connector-odbc*
ln -s /usr/lib/libmyodbc8a.so /usr/lib/libmyodbc5.so
- Download Avaya Aura AE Services 8.1.3 TSAPI Client for RHEL 7 from DevConnect
- chmod +x tsapi-client-linux-8.1.3-25.i386.bin
- Execute the installation file tsapi-client-linux-8.1.3-25.i386.bin
- ./tsapi-client-linux-8.1.3-25.i386.bin
- Edit /usr/lib/tslibrc, change 127.0.0.1 to the IP address of your Avaya AES
- Config and start MySQL
-
chkconfig mysqld on
-
service mysqld start
- Create database and user
-
mysql -u root -p
-
create database autobridge;
-
create user 'tcpgate'@'localhost' identified by 'P@ssw0rd';
-
grant all on autobridge.* to 'tcpgate'@'localhost';
-
flush privileges;
-
quit
-
mysql -h localhost -u tcpgate -p autobridge < autobridge.sql
- Copy the following to /etc/odbc.ini file
- [AUTOBRIDGECFG]
Description = MySQL connection to AutoBridge
Driver = MySQL
Server = localhost
Port = 3306
Database = autobridge
- [AUTOBRIDGECFG]
- Create user and copy files
-
useradd upinget
-
mkdir /usr/local/autobridge
-
cp AutoBridge /usr/local/autobridge
-
chmod +x /usr/local/autobridge/AutoBridge
-
chown -R upinget.upinget /usr/local/autobridge
-
mkdir -p /var/log/autobridge
-
chown -R upinget.upinget /var/log/autobridge
- Auto start the daemon after server reboot
-
echo "rm /tmp/autobridge.log" >> /etc/rc.local
-
echo "su upinget -c '/usr/local/autobridge/AutoBridge -u tcpgate -p 40UIt9O3PqtwsSn+Wx6pig=='" >> /etc/rc.local
-
chmod +x /etc/rc.local
