Introduction

The ctiSVR (also known as ivrSVR, the two names are interchangeable) is a CTI server for IVR systems and agent front-end applications. The ctiSVR is part of the CTI Architecture, it uses TSAPI library to monitor IVR and agent extensions, it hides the technical details of TSAPI and provides simple ActiveX, REST and WebSocket interfaces for the development of IVR systems and front-end applications. The ctiSVR program supports passing of customized user data between different kinds of CTI software when a customized DLL is developed. Currently, the ctiSVR program supports the following call control functions:
- ACD Login – Login ACD
- ACD Logout – Logout ACD
- ACD SetState – Set AUX, ACW, MANUAL or AUTO mode
- MakeCall – Make a call
- Answer – Answer a call
- Hangup – Hangup a call
- DropParty – Drop a specific party from a call
- Hold – Hold a call
- Retrieve – Retrieve a call
- Transfer – Single step or two steps transfer which depends on extension state
- Conference – Single step or two steps conference which depends on extension state
- Consultation – Make a consultation call
- Reconnect – Reconnect from a consultation call
- Alternate – Alternate a hold and a connected call
- SingleStepConference – Join a new device into an existing call
- SingleStepTransfer – Transfers an existing connection to another device
- SelectiveListeningHold – Prevent a specific party on a call from hearing anything said by another specific party or all other parties on the call
- SelectiveListeningRetrieve – Retrieve a party from listen-hold to another party or all parties that were previously being listen-held
- DTMF – Send a DTMF tone or a string of DTMF tones
- UserData – Get user data when a call alert or hangup
- ClearCall – Clear a call or all calls of an extension
- DeflectCall – Redirects an alerting call at a device with the connection to a new destination, either on-PBX or off-PBX
- PickupCall – Redirects an alerting call at a device to another on-PBX device
- Snapshot – Snapshot a device
- QueryACDSplit – Query ACD split and provides number of available agents, number of calls in queue and number of logon agents
- QueryAgentLogin – Query the extension of each ACD agent logged into the specified ACD split
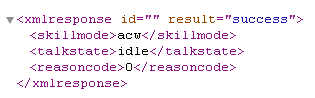
- QueryAgentState – Query the agent state of an ACD agent
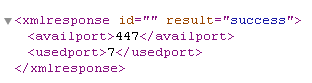
- QueryCallClassifier – Query the number of “idle” and “in-use” ports of call classifier cards
- QueryTimeOfDay – Query the switch information for the year, month, day, hour, minute, and second
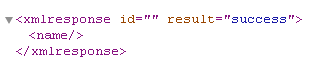
- QueryDeviceName – Query the associated name of the device
- QueryDoNotDisturb – Query the status of the send all calls feature expressed as on or off at a device
- QueryDeviceInfo – Query the class and type of a device
- QueryForwarding – Query the forwarding status of the device
- QueryMsgWaitingInd – Query status of the message waiting indicator expressed as on or off for a device
- QueryStationStatus – Query the idle and/or busy state of a station
- QueryTrunkGroup – Query the number of idle trunks and the number of in-use trunks
- QueryUCID – Query the Universal Call ID (UCID) for a normal callID
- SetDoNotDisturb – Turns on or off the G3 Send All Calls (SAC) feature for a user station
- SetForwarding – Sets the G3 Call Forwarding feature on or off for a user station
- SetMsgWaitingInd – Sets the G3 Message Waiting Indicator (MWI) on or off for a user station
- MyExtension – Query extension number by IP address
- ListExtension – List all extensions that monitored by ctiSVR
- AddExtension – Add extension and start monitoring by ctiSVR
- DelExtension – Delete extension and stop monitoring by ctiSVR
- MakePhantomCall – Use a phantom device that is controlled by ctiSVR to make call, waits Connect or Disconnect event in a provided duration
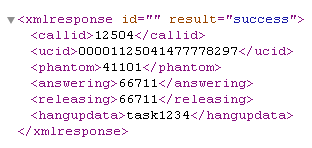
- PinVer – Conference a IVR extension and waits for Disconnect event which the PinVer result is contained in the hangup data of the Disconnect event
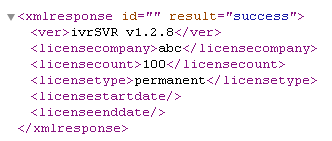
- SvrInfo – Get version and license information
- SplitSkillStatus – Display login status of a split/skill
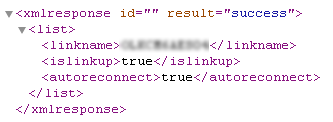
- GetLinkStatus – Get DMCC link status
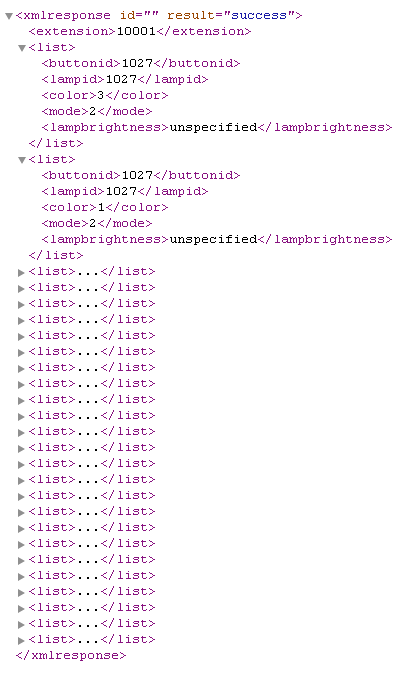
- GetButtonInformation – Get button information of an extension by DMCC API
- GetLampMode – Get lamp mode of an extension by DMCC API
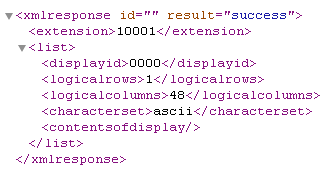
- GetDisplay – Get display of an extension by DMCC API
- GetHookSwitchStatus – Get hook switch status of an extension by DMCC API
- GetRingerStatus – Get ringer status of an extension by DMCC API
- GetRegistrationState – Get registration state of an extension by DMCC API
- ValidateDeviceSecurityCode – Validate device security code of an extension by DMCC API
- ChangeDeviceSecurityCode – Change device security code of an extension by DMCC API
- ButtonPress – Press a button of an extension by DMCC API
- SetHookSwitchStatus – Set hook switch status by DMCC API
Web Softphone

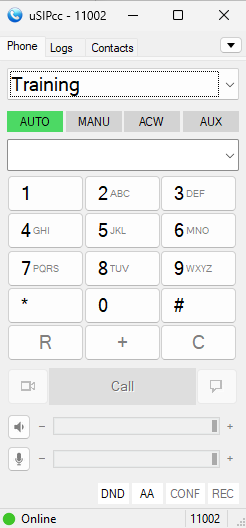
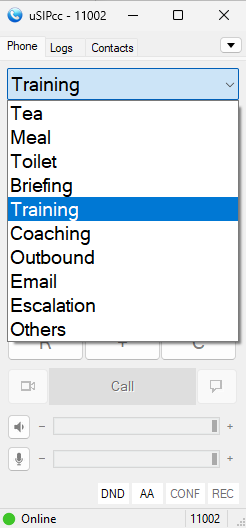
Web Softphone is supported by ctiSVR now! The softphone is crated simply by a PHP page and uses WebSocket to communicate with ctiSVR. If you have CRM application, you can include this page and customize it as CTI application. Have Fun!
Pricing Details
Check the pricing from this URL
Reference Manual
Upgrade Procedure
Docker Implementation
Supported Environment
- Avaya AES 6.x, 7.x, 8.x, 10.x
- Latest version Windows Server
- Latest version of RedHat/Rocky Linux
Supported Integration Interfaces
Testing using Docker Image
Please follow this guide to test CtiSVR using Docker Container.
Testing using OVA File

Please contact us for a latest version of OVA image. After deploying the OVA file, please modify the following for your own environment:
- Reference this guide to delete the file /etc/udev/rules.d/70-persistent-net.rules
- Change the MAC address and IP address of the VM in the file /etc/sysconfig/network-scripts/ifcfg-eth0
- Edit /usr/lib/tslibrc, change 127.0.0.1 to the IP address of your Avaya AES
- Telnet to ctiSVR console port 14012, update the parameters ivr_tlink_01 and ivr_tlink_02. The ivr_tlink_01 and ivr_tlink_02 string contain three fields and they are separated by comma (,). For example “AVAYA#AVAYA_ECS#CSTA#XXXXXX,username,encrypted_password”
- AVAYA#AVAYA_ECS#CSTA#XXXXXX is the tlink, you can get the name by command /usr/lib/tstest
- username is the AES cti user
- encrypted_password can be obtained by tcpgate console command genpass, enter your AES cti user password two times you will get the encrypted password
- Once the changes are completed, reboot the VM
- Contact service@upinget.com for a trial license
The username and password of the OVA VM is
- OS : root/P@ssw0rd
- MySQL: root/P@ssw0rd
- ivrSVR console: tcpgate/tcpgate01
- uuiSVR console: tcpgate/tcpgate01
Windows Installation – Preparation and Password Encryption
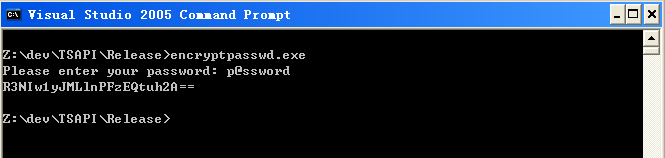
- The access MDB file stored the username and password of AE server. For security reason, a tool called encryptpasswd.exe is provided to generate an encrypted password for the installation and configuration of the software
- Execute the program, generate an encrypted passwords for the user of AE server, then paste the encrypted password to parameter ivr_tlink. For example, the encrypted password for “p@ssword” is “R3NIw1yJMLlnPFzEQtuh2A==”

Windows Installation – ODBC Administration
- For 64 bit Windows system, please follow the steps below
- For CtiSVR 64bit version, configure ODBC System DSN using
- C:\Windows\System32\odbcad32.exe
- Stop the Windows firewall because it enables by default and telnet port 14012 is required for the application.
Windows Installation Guide
- Download the TSAPI client for Windows 64-bit from Avaya web site, it contains the library files. DevConnect registration is required before you can access the download page.
- Download the ivrSVR zip file here or backup site.
- Follow the installation steps below to install the software.
- Extract all the files into directory c:\program files\ivrSVR
- Open Windows Command Prompt, enter the following commands to register the program as Windows Service
- cd c:\program files\ivrSVR
- ivrSVR64 -i
- sc description ivrSVR64 “Provides CTI functions for Avaya CM”
- uuiSVR64 -i
- sc description uuiSVR64 “Provides userdata functions for ctiSVR”
- If you cannot find the Microsoft Access Driver when using the ODBC Data Source Administrator (64-bit), please download and install Microsoft Access Database Engine 2016 Redistributable
- Open ODBC Setting, create a System DSN called IVRSVRCFG for Microsoft Access Driver and point to ivrsvr.mdb which is located in the directory c:\program files\ivrSVR
- Open ODBC Setting, create a System DSN called UUISVRCFG for Microsoft Access Driver and point to uuisvr.mdb which is located in the directory c:\program files\ivrSVR
- Start the Windows Service ivrSVR
- Telnet to localhost and port number 14012, enter username tcpgate and password tcpgate01 to access the program console
- Enter the following command to setup the ctiSVR
- Enter the following command to add extension, the ivrSVR can control the extension once it is added to the database
- Enter the following command in the program console, you will receive debug information
- Enter the following command in the program console, you will get the help message
- To support passing of user data between applications, please install uuiSVR which is described in ScreenPop page. Then modify the ivr_uuisvr parameter to have the IP address and port number of the uuiSVR.
RedHat/CentOS 7.x Installation Guide

- The following is for RedHat/CentOS 7 (64 bit only), other Linux distributions are not supported
- The ctiSVR is built using Avaya TSAPI 32bit library, the ctiSVR executable is also a 32bit application
- Login as root and execute the following commands
-
yum update
-
reboot
- Install the MySQL 8.x
-
sudo rpm -Uvh https://dev.mysql.com/get/mysql80-community-release-el7-1.noarch.rpm
sudo yum --enablerepo=mysql80-community install mysql-community-server
sudo service mysqld start
grep "A temporary password" /var/log/mysqld.log
mysql_secure_installation
- Install the following packages
-
yum install glibc.i686 libstdc++.i686 expat.i686 unixODBC.i686 openssl-libs.i686 telnet wget telnet
-
wget https://dev.mysql.com/get/Downloads/Connector-ODBC/8.0/mysql-connector-odbc-setup-8.0.22-1.el7.i686.rpm
wget https://dev.mysql.com/get/Downloads/Connector-ODBC/8.0/mysql-connector-odbc-8.0.22-1.el7.i686.rpm
yum install mysql-connector-odbc*
ln -s /usr/lib/libmyodbc8a.so /usr/lib/libmyodbc5.so
- Download Avaya Aura AE Services 8.1.3 TSAPI Client for RHEL 7 from DevConnect
- chmod +x tsapi-client-linux-8.1.3-25.i386.bin
- Execute the installation file tsapi-client-linux-8.1.3-25.i386.bin
- ./tsapi-client-linux-8.1.3-25.i386.bin
- Edit /usr/lib/tslibrc, change 127.0.0.1 to the IP address of your Avaya AES
- Config and start MySQL
-
chkconfig mysqld on
-
service mysqld start
- Create database and user
-
mysql -u root -p
-
create database ivrsvr;
-
create database uuisvr;
-
create user 'tcpgate'@'localhost' identified by 'P@ssw0rd';
-
grant all on ivrsvr.* to 'tcpgate'@'localhost';
-
grant all on uuisvr.* to 'tcpgate'@'localhost';
-
flush privileges;
-
quit
-
mysql -h localhost -u tcpgate -p ivrsvr < ivrsvr.sql
-
mysql -h localhost -u tcpgate -p uuisvr < uuisvr.sql
- Copy the following to /etc/odbc.ini file
- [IVRSVRCFG]
Description = MySQL connection to ivrSVR
Driver = MySQL
Server = localhost
Port = 3306
Database = ivrsvr
- [UUISVRCFG]
Description = MySQL connection to uuiSVR
Driver = MySQL
Server = localhost
Port = 3306
Database = uuisvr
- Create user and copy files
-
useradd upinget
-
mkdir /usr/local/ctisvr
-
cp ivrSVR /usr/local/ctisvr
-
cp uuiSVR /usr/local/ctisvr
-
chmod +x /usr/local/ctisvr/ivrSVR
-
chmod +x /usr/local/ctisvr/uuiSVR
-
chown -R upinget.upinget /usr/local/ctisvr
-
mkdir -p /var/log/ivrsvr
-
mkdir -p /var/log/uuisvr
-
chown -R upinget.upinget /var/log/ivrsvr
-
chown -R upinget.upinget /var/log/uuisvr
- Auto start the daemon after server reboot
-
echo "rm /tmp/ivrsvr.log" >> /etc/rc.local
-
echo "su upinget -c '/usr/local/ctisvr/ivrSVR -u tcpgate -p 40UIt9O3PqtwsSn+Wx6pig=='" >> /etc/rc.local
-
echo "rm /tmp/uuisvr.log" >> /etc/rc.local
-
echo "su upinget -c '/usr/local/ctisvr/uuiSVR -u tcpgate -p 40UIt9O3PqtwsSn+Wx6pig=='" >> /etc/rc.local
-
chmod +x /etc/rc.local
Change of License Key
- Once you obtained a license key, please enter the following tcpgate console commands to activate the license. For example, if your license key is Bbshtj3sohqSKqqY41wM/qG6zSKvJNh+nrxy4zGXfDM=
- update parameter ivr_licensekey Bbshtj3sohqSKqqY41wM/qG6zSKvJNh+nrxy4zGXfDM=
- reload
- To check your license status, the command is
Failover of Avaya AES
- The ctiSVR supports multiple Avaya AES, it switches to another AES automatically when it detects active stream is failure. The ctiSVR has internal polling thread, it checks Avaya AES status every 30 seconds. When it detects Avaya AES failure, it failover to another Avaya AES automatically.
Change of Avaya AES
- The ivrSVR supports multiple Avaya AES, it switches to another AES automatically when it detects active stream is failure.
- The default configuration database (ivrSVR.mdb) contains two entries of AES information, to change the AES information, please enter the follwoing tcpgate console commands
- genpass
- Enter the AES CTI user password twice to generate an encrypted password
- update parameter ivr_tlink_01 AVAYA#AVAYA_ECS#CSTA#XXXXXX,username,encrypted_password
- Service restart is needed after the change of AES informaiton
White list or Black list Servers
- To protect ivrSVR from unauthorized access, enter the following tcpgate console commands to add white list servers
- add whitelist 10.10.1.220 webServerA
- Add webServerA in white list and its IP address is 10.10.1.220
- If you want to add an IP address in black list, enter the following tcpgate console commands
- add blacklist 10.10.1.221 webServerB
- Add webServerB in black list and its IP address is 10.10.1.221
Process and Port Monitoring
- If you have NMS and want to monitor the status of ivrSVR, please monitor the following
- Process Monitoring
- Port Monitoring
- Please make sure firewall open for the following ports
- ivrSVR
- 14012 – tcpgate console port
- 9001 – REST interface port, you can change it by the “update tcp” command
- 9002 – ctiClient.ocx API port
- 9003 – WebSocket interface port
- uuiSVR
- 14014 – tcpgate console port
- 5100 – User data exchange port
System Logging
- The ivrSVR only logs critical error messages, you can find these message on Event Viewer
- For system monitoring purpose, suggest monitoring these information and error messages on Event Viewer
- “QueryDeviceInfo returned error code, please check device…”
- “MonitorDevice returned error code, please check device…”
- “Received Monitor Ended Event, caused by…”
- “Received Universial Failure Event…”
- “Received TSAPI Stream ReOpen event. Active TLINK is…”
- “CIVRSvrMgr::Initialize failed, possibly initialize TSAPI failed.”
- To view real time debug messages, please enter the following tcpgte console commands
Load Balance and Redundant Configuration
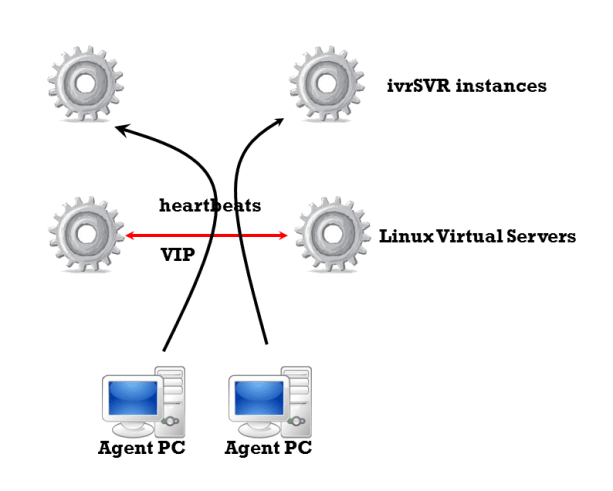
- The ivrSVR is designed as a stateless CTI server especially the REST interface which the client connections can be persistent or temporary with the server.
- You can use Linux Virtual Servers to form a Virtual IP (VIP) for ivrSVR instances. If you configure the LVS as round robin, then load balance of ivrSVR can be implemented very easily.
- If one of the ivrSVR server instance is failure, LVS can detect it and route the subsequent traffic to other healthy ivrSVR instances.
- If you want to remove a particular ivrSVR instance from the LVS, you can do it very easily by the following tcpgate console command
- add blacklist 10.10.1.231 activeLVS
- Hint: this adds the active LVS as blacklist IP address to ivrSVR, the polling messages from the LVS will not be entertained and LVS will remove the ivrSVR from the connection pool.
- delete blacklist 10.10.1.231
- Hint: After maintenance, please remove the blacklist so LVS polling messages will be entertained and LVS will add the ivrSVR to the connection pool.
Customized DLL for Passing of User Data
- Edit the parameters to enable passing of user data. A customized DLL is used to set or get of user data from UUI key
- ivr_custdataconfigstring, the configuration string of your customized DLL
- ivr_custdatadll, the path and name of the DLL
- ivr_custdatamaxsize, the maximum size of user data
ActiveX
- Register the ActiveX control ctiClient.ocx by the following Windows command
- Enter the following command in the program console to add an API interface port
- add tcp 9002 * * custom ivrsvrapi
REST interface
- Enter the following command in the program console to add a REST interface port
- add tcp 9001 * * custom ivrsvrrest
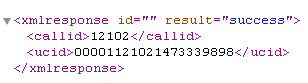
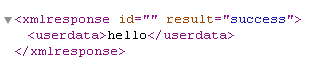
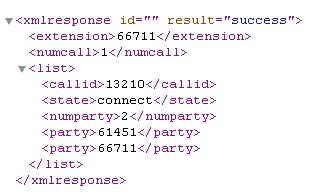
- The returned payload can be in JSON format when parameter payload=json is added
- ACD Login
- ACD Logout
- ACD SetState
- MakeCall
- Answer
- Hangup
- DropParty
- Hold
- Retrieve
- Transfer
- Conference
- Consultation
- Reconnect
- Alternate
- DTMF
- UserData
- ClearCall
- DeflectCall
- PickupCall
- SingleStepConference
- SingleStepTransfer
- SelectiveListeningHold
- SelectiveListeningRetrieve
- Snapshot
- QueryACDSplit
- QueryAgentLogin
- QueryAgentState
- QueryCallClassifier
- QueryTimeOfDay
- QueryDeviceName
- QueryDoNotDisturb
- QueryDeviceInfo
- QueryForwarding
- QueryMsgWaitingInd
- QueryStationStatus
- QueryTrunkGroup
- QueryUCID
- SetDoNotDisturb
- SetForwarding
- SetMsgWaitingInd
- MyExtension
- ListExtension
- AddExtension
- DelExtension
- MekePhantomCall
- PinVer
- SvrInfo
- SplitSkillStatus
- GetLinkStatus
- GetButtonInformation
- GetLampMode
- GetDisplay
- GetHookSwitchStatus
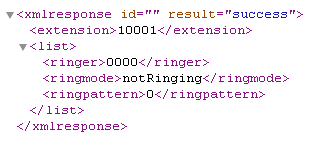
- GetRingerStatus
- GetRegistrationState
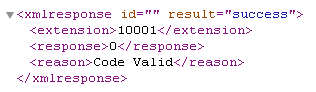
- ValidateDeviceSecurityCode
- ChangeDeviceSecurityCode
- ButtonPress
- SetHookSwitchStatus
Installation for WebSocket interface Call Control
- Enter the following command in the program console to add a WebSocket interface port
- add tcp 9003 * * custom ivrsvrws
- WebSocket interface accepts JSON request, returns JSON response and delivers unsolicited JSON events
- The JSON strings for MakeCall request and response are
{
“id”: “1”,
“request”: “makecall”,
“extension”: “101”,
“destination”: “67896789”,
“data”: “hello world”
}
{
“msgtype”: “response”,
“id”: “1”,
“result”: “success”,
“callid”: “12345”,
“ucid”: “00001148011456795778”
}
- The JSON strings for Hold call request and response are
{
“id”: “2”,
“request”: “hold”,
“extension”: “101”
}
{
“msgtype”: “response”,
“id”: “2”,
“result”: “success”,
“error”: “”
}
- The JSON strings for Retrieve call request and response are
{
“id”: “3”,
“request”: “retrieve”,
“extension”: “101”
}
{
“id”: “3”,
“request”: “retrieve”,
“extension”: “101”,
“destination”: “T1234#1”
}
{
“msgtype”: “response”,
“id”: “3”,
“result”: “success”,
“error”: “”
}
- The JSON strings for Hangup call request and response are
{
“id”: “4”,
“request”: “hangup”,
“extension”: “101”,
“data”: “hello world”
}
{
“msgtype”: “response”,
“id”: “4”,
“result”: “success”,
“error”: “”
}
- The JSON strings for DropParty call request and response are
{
“id”: “5“,
“request”: “dropparty”,
“extension”: “101”,
“party”: “60123”,
“data”: “hello world”
}
{
“msgtype”: “response”,
“id”: “5“,
“result”: “success”,
“error”: “”
}
- The JSON strings for Answer call request and response are
{
“id”: “6“,
“request”: “answer”,
“extension”: “101”,
“destination”: “67896789”
}
{
“msgtype”: “response”,
“id”: “6“,
“result”: “success”,
“callid”: “12345”
}
- The JSON strings for Consultation call request and response are
{
“id”: “7“,
“request”: “consultation”,
“extension”: “101”,
“destination”: “67896789”,
“data”: “hello world”
}
{
“msgtype”: “response”,
“id”: “7“,
“result”: “success”,
“primarycallid”: “123”,
“secondarycallid”: “456”,
“ucid”: “00001148011456795778”
}
- The JSON strings for Reconnect call request and response are
{
“id”: “8“,
“request”: “reconnect”,
“extension”: “101”
}
{
“msgtype”: “response”,
“id”: “8“,
“result”: “success”,
“error”: “”
}
- The JSON strings for Alternate call request and response are
{
“id”: “9“,
“request”: “alternate”,
“extension”: “101”
}
{
“msgtype”: “response”,
“id”: “9“,
“result”: “success”,
“error”: “”
}
- The JSON strings for Transfer call request and response are
{
“id”: “10“,
“request”: “transfer”,
“extension”: “101”,
“destination”: “67896789”
}
{
“msgtype”: “response”,
“id”: “10“,
“result”: “success”,
“error”: “”
}
- The JSON strings for Conference call request and response are
{
“id”: “11“,
“request”: “conference”,
“extension”: “101”,
“destination”: “67896789”
}
{
“msgtype”: “response”,
“id”: “11“,
“result”: “success”,
“error”: “”
}
- The JSON strings to send DTMF request and response are
{
“id”: “12“,
“request”: “dtmf”,
“extension”: “101”,
“dtmf”: “1”
}
{
“msgtype”: “response”,
“id”: “12“,
“result”: “success”,
“error”: “”
}
- The JSON strings for ACD Login request and response are
{
“id”: “13“,
“request”: “login”,
“extension”: “101”,
“agentid”: “12345”,
“passwd”: “67890”
}
{
“msgtype”: “response”,
“id”: “13“,
“result”: “success”,
“error”: “”
}
- The JSON strings for ACD Logout request and response are
{
“id”: “14“,
“request”: “logout”,
“extension”: “101”,
“agentid”: “12345”,
“passwd”: “67890”
}
{
“msgtype”: “response”,
“id”: “14“,
“result”: “success”,
“error”: “”
}
- The JSON strings for ACD SetState request and response are, add parameter “enablepending”: “true” to enable pending mode while in call
{
“id”: “15“,
“request”: “setstate”,
“extension”: “101”,
“state”: “aux”,
“reasoncode”: “1”
}
{
“id”: “15“,
“request”: “setstate”,
“extension”: “101”,
“state”: “acw”
}
{
“id”: “15“,
“request”: “setstate”,
“extension”: “101”,
“state”: “manual”
}
{
“id”: “15“,
“request”: “setstate”,
“extension”: “101”,
“state”: “auto”
}
{
“msgtype”: “response”,
“id”: “15“,
“result”: “success”,
“error”: “”
}
- The JSON strings for StartMonitor extension
{
“id”: “16“,
“request”: “startmonitor”,
“extension”: “101”
}
{
“msgtype”: “response”,
“id”: “16“,
“result”: “success”,
“error”: “”
}
- The JSON strings for StopMonitor extension
{
“id”: “17“,
“request”: “stopmonitor”,
“extension”: “101”
}
{
“msgtype”: “response”,
“id”: “17“,
“result”: “success”,
“error”: “”
}
- The JSON strings for Alert UserData request and response are
{
“id”: “18“,
“request”: “userdata”,
“extension”: “101”,
“type”: “alert”
}
{
“msgtype”: “response”,
“id”: “18“,
“result”: “success”,
“callid”: 1361,
“calling”: “101”,
“called”: “102”,
“alerting”: “102”,
“cli”: “101”,
“dnis”: “102”,
“uec”: “”,
“ucid”: “00001013551428290972”,
“split”: “”,
“trunkgroup”: “5”,
“trunkmember”: “20”,
“userdata”: “”
}
- The JSON strings for Hangup UserData request and response are
{
“id”: “19“,
“request”: “userdata”,
“extension”: “101”,
“type”: “hangup”
}
{
“msgtype”: “response”,
“id”: “19“,
“result”: “success”,
“callid”: 1361,
“releasing”: “101”,
“ucid”: “00001013551428290972”,
“userdata”: “”
}
- The JSON strings for Get, Set and Update UserData requests are
{
“id”: “20“,
“request”: “userdata”,
“extension”: “101”,
“type”: “get”,
“uui”: “FCCCCCCC0000000156A853617F00000113EC00000005”
}
{
“msgtype”: “response”,
“id”: “20“,
“result”: “success”,
“data”: “get data”
}
{
“id”: “20“,
“request”: “userdata”,
“extension”: “101”,
“type”: “set”,
“data”: “set data”
}
{
“msgtype”: “response”,
“id”: “20“,
“result”: “success”,
“uui”: “FCCCCCCC0000000156A853617F00000113EC00000005”
}
{
“id”: “20“,
“request”: “userdata”,
“extension”: “101”,
“type”: “update”,
“uui”: “FCCCCCCC0000000156A853617F00000113EC00000005”,
“data”: “upate data”
}
{
“msgtype”: “response”,
“id”: “20“,
“result”: “success”,
“error”: “”
}
- The JSON strings for ClearCall request and response are
{
“id”: “21“,
“request”: “clearcall”,
“extension”: “101”,
“destination”: “102”
}
{
“msgtype”: “response”,
“id”: “21“,
“result”: “success”,
“error”: “”
}
- The JSON strings for DeflectCall request and response are
{
“id”: “22“,
“request”: “deflectcall”,
“extension”: “101”,
“destination”: “102”
}
{
“msgtype”: “response”,
“id”: “22“,
“result”: “success”,
“error”: “”
}
- The JSON strings for PickupCall request and response are
{
“id”: “23“,
“request”: “pickupcall”,
“extension”: “101”,
“destination”: “102”
}
{
“msgtype”: “response”,
“id”: “23“,
“result”: “success”,
“error”: “”
}
- The JSON strings for Snapshot request and response are
{
“id”: “24“,
“request”: “snapshot”,
“extension”: “101”
}
{
“msgtype”: “response”,
“id”: “24“,
“result”: “success”,
“error”: “”,
“extension”: “101”,
“numcall”: 1,
“list”: [
{
“callid”: 13815,
“state”: “connect”,
“numparty”: 2,
“party”: [
{
“extension”: “101”
},
{
“extension”: “T13815#2”
}
]
}
]
}
- The JSON strings for SingleStepConference request and response are
{
“id”: “25“,
“request”: “singlestepconference”,
“extension”: “101”,
“devicetojoin”: “102”,
“type”: “passive”
}
{
“msgtype”: “response”,
“id”: “25“,
“result”: “success”,
“callid”: “12345”,
“ucid”: “00001000481428289124”
}
- The JSON strings for SingleStepTransfer request and response are
{
“id”: “25“,
“request”: “singlesteptransfer”,
“extension”: “101”,
“destination”: “102”
}
{
“msgtype”: “response”,
“id”: “25“,
“result”: “success”,
“callid”: “12345”,
“ucid”: “00001000481428289124”
}
- The JSON strings for SelectiveListeningHold request and response are
{
“id”: “26“,
“request”: “selectivelisteninghold”,
“extension”: “101”,
“party”: “102”
}
{
“id”: “26“,
“request”: “selectivelisteninghold”,
“extension”: “101”,
“party”: “all”
}
{
“msgtype”: “response”,
“id”: “27“,
“result”: “success”
}
- The JSON strings for SelectiveListeningRetrieve request and response are
{
“id”: “27“,
“request”: “selectivelisteningretrieve”,
“extension”: “101”,
“party”: “102”
}
{
“id”: “27“,
“request”: “selectivelisteningretrieve”,
“extension”: “101”,
“party”: “all”
}
{
“msgtype”: “response”,
“id”: “27“,
“result”: “success”
}
- The JSON strings for QueryACDSplit request and response are
{
“id”: “28“,
“request”: “queryacdsplit”,
“split”: “201”
}
{
“msgtype”: “response”,
“id”: “28“,
“result”: “success”,
“agentsavailable”: 5,
“callsqueue”: 0,
“agentslogon”: 26
}
- The JSON strings for QueryAgentLogin request and response are
{
“id”: “29“,
“request”: “queryagentlogin”,
“split”: “201”
}
{
“msgtype”: “response”,
“id”: “29“,
“result”: “success”,
“split”: “201”,
“numextension”: 5,
“list”: [
{
“extension”: “101”
},
{
“extension”: “102”
},
{
“extension”: “103”
},
{
“extension”: “104”
},
{
“extension”: “105”
}
]
}
- The JSON strings for QueryAgentState request and response are
{
“id”: “30“,
“request”: “queryagentstate”,
“extension”: “101”
}
{
“msgtype”: “response”,
“id”: “30“,
“result”: “success”,
“skillmode”: “null”,
“talkstate”: “idle”,
“reasoncode”: 0
}
- The JSON string for QueryCallClassifier request and response are
{
“id”: “31“,
“request”: “querycallclassifier”
}
{
“msgtype”: “response”,
“id”: “31“,
“result”: “success”,
“availport”: 439,
“usedport”: 5
}
- The JSON string for QueryTimeOfDay request and response are
{
“id”: “32“,
“request”: “querytimeofday”
}
{
“msgtype”: “response”,
“id”: “32“,
“result”: “success”,
“year”: 16,
“month”: 3,
“day”: 23,
“hour”: 22,
“minute”: 24,
“second”: 16
}
- The JSON string for QueryDeviceName request and response are
{
“id”: “33“,
“request”: “querydevicename”,
“extension”: “101”
}
{
“msgtype”: “response”,
“id”: “33“,
“result”: “success”,
“name”: “Peter”
}
- The JSON string for QueryDoNotDisturb request and response are
{
“id”: “34“,
“request”: “querydonotdisturb”,
“extension”: “101”
}
{
“msgtype”: “response”,
“id”: “34“,
“result”: “success”,
“dnd”: “false”
}
- The JSON string for QueryDeviceInfo request and response are
{
“id”: “35“,
“request”: “querydeviceinfo”,
“extension”: “101”
}
{
“msgtype”: “response”,
“id”: “35“,
“result”: “success”,
“associatedclass”: “other”,
“associateddevice”: “”
}
- The JSON string for QueryForwarding request and response are
{
“id”: “36“,
“request”: “queryforwarding”,
“extension”: “101”
}
{
“msgtype”: “response”,
“id”: “36“,
“result”: “success”,
“destination”: “102”
}
- The JSON string for QueryMsgWaitingInd request and response are
{
“id”: “37“,
“request”: “querymsgwaitingind”,
“extension”: “101”
}
{
“msgtype”: “response”,
“id”: “37“,
“result”: “success”,
“indicator”: “false”
}
- The JSON string for QueryStationStatus request and response are
{
“id”: “38“,
“request”: “querystationstatus”,
“extension”: “101”
}
{
“msgtype”: “response”,
“id”: “38“,
“result”: “success”,
“busy”: “false”
}
- The JSON string for QueryTrunkGroup request and response are
{
“id”: “39“,
“request”: “querytrunkgroup”,
“tag”: “410”
}
{
“msgtype”: “response”,
“id”: “39“,
“result”: “success”,
“idletrunks”: 91,
“usedtrunks”: 1
}
- The JSON string for QueryUCID request and response are
{
“id”: “40“,
“request”: “queryucid”,
“callid”: “123”
}
{
“msgtype”: “response”,
“id”: “40“,
“result”: “success”,
“ucid”: “00001148011456795778”
}
- The JSON string for SetDoNotDisturb request and response are
{
“id”: “41“,
“request”: “setdonotdisturb”,
“extension”: “101”,
“dnd”: “true”
}
{
“msgtype”: “response”,
“id”: “41“,
“result”: “success”,
“error”: “”
}
- The JSON string for SetForwarding request and response are
{
“id”: “42“,
“request”: “setforwarding”,
“extension”: “101”,
“destination”: “102”,
“fwd”: “true”
}
{
“msgtype”: “response”,
“id”: “42“,
“result”: “success”,
“error”: “”
}
- The JSON string for SetMsgWaitingInd request and response are
{
“id”: “43“,
“request”: “setmsgwaitingind”,
“extension”: “101”,
“ind”: “true”
}
{
“msgtype”: “response”,
“id”: “43“,
“result”: “success”,
“error”: “”
}
- The JSON string for MyExtension request and response are
{
“id”: “44“,
“request”: “myextension”
}
{
“msgtype”: “response”,
“id”: “44“,
“result”: “success”,
“extension”: “66711”
}
- The JSON string for ListExtension request and response are
{
“id”: “45“,
“request”: “listextension”
}
{
“msgtype”: “response”,
“id”: “45“,
“result”: “success”,
“numextension”: 5,
“list”: [
{
“extension”: “61450”
},
{
“extension”: “61451”
},
{
“extension”: “66711”
},
{
“extension”: “66820”
},
{
“extension”: “66910”
}
]
}
- The JSON string for AddExtension request and response are
{
id: “46”,
request: “addextension”,
username: “tcpgate”,
passwd: “encrypted_passwd_by_genpass”,
extension: “66711”
}
{
“msgtype”: “response”,
“id”: “46”,
“result”: “success”,
“error”: “The command completed successfully.”
}
- The JSON string for DelExtension request and response are
{
id: “47”,
request: “delextension”,
username: “tcpgate”,
passwd: “encrypted_passwd_by_genpass”,
extension: “66711”
}
{
“msgtype”: “response”,
“id”: “47”,
“result”: “success”,
“error”: “The command completed successfully.”
}
- The JSON string for MakePhantomCall request and response are
{
id: “48”,
request: “makephantomcall”,
destination: “912345678”,
duration: 20,
waitevent: “connect”,
data: “hello”
}
{
“msgtype”: “response”,
“id”: “48”,
“result”: “success”,
“callid”: 13562,
“ucid”: “00001135621477779601”,
“phantom”: “41103”,
“answering”: “T13562#2”,
“releasing”: “”,
“hangupdata”: “”
}
- The JSON string for PinVer request and response are
{
id: “49”,
request: “pinver”,
extension: “61451”,
destination: “66711”,
druation: 20,
data: “hello”
}
{
“msgtype”: “response”,
“id”: “49”,
“result”: “success”,
“callid”: 13693,
“ucid”: “00001136931477780159”,
“answering”: “66711”,
“releasing”: “66711”,
“hangupdata”: “ok”
}
- The JSON string for SvrInfo request and response are
{
id: “50”,
request: “svrinfo”
}
{
“msgtype”: “response”,
“id”: “50”,
“result”: “success”,
“ver”: “ivrSVR 1.2.8”,
“licensecompany”: “abc”,
“licensecount”: “100”,
“licensetype”: “permanent”,
“licensestartdate”: “”,
“licenseenddate”: “”
}
- The JSON strings for incoming Call Offer event is
{
“msgtype”: “event”,
“eventtype”: “offer”,
“referenceid”: 1,
“origcalling”: “101”,
“origcalled”: “102”,
“calling”: “101”,
“called”: “102”,
“alerting”: “102”,
“ucid”: “00001094861421138402”,
“uui”: “”,
“uec”: “”,
“split”: “”,
“custdata”: “”,
“time”: 1424044800,
“trunkgroup”: “10”,
“trunkmember”: “12”,
“lastredirection”: “”,
“callid”: 48
}
- The JSON string for outgoing Call Alert event is
{
“msgtype”: “event”,
“eventtype”: “alert”,
“referenceid”: 1,
“origcalling”: “101”,
“origcalled”: “102”,
“calling”: “101”,
“called”: “102”,
“alerting”: “102”,
“ucid”: “00001000481428289124”,
“uui”: “”,
“custdata”: “”,
“time”: 1428289128,
“trunkgroup”: “5”,
“trunkmember”: “118”,
“callid”: 48
}
- The JSON string for Call Connect event is
{
“msgtype”: “event”,
“eventtype”: “connect”,
“referenceid”: 1,
“origcalling”: “101”,
“origcalled”: “102”,
“calling”: “101”,
“called”: “102”,
“answering”: “102#2”,
“ucid”: “00001000481428289124”,
“uui”: “”,
“uec”: “”,
“split”: “”,
“custdata”: “”,
“time”: 1428289134,
“trunkgroup”: “5”,
“trunkmember”: “118”,
“lastredirection”: “”,
“callid”: 48
}
- The JSON string for Call Fail event is
{
“msgtype”: “event”,
“eventtype”: “fail”,
“referenceid”: 1,
“failing”: “101”,
“called”: “102”,
“cause”: 23,
“time”: 1424044800,
“callid”: 48
}
- The JSON string for Call Hold event is
{
“msgtype”: “event”,
“eventtype”: “hold”,
“referenceid”: 1,
“holding”: “101”,
“time”: 1428289135,
“callid”: 48
}
- The JSON string for Call Retrieve event is
{
“msgtype”: “event”,
“eventtype”: “retrieve”,
“referenceid”: 1,
“retrieving”: “101”,
“time”: 1428289135,
“callid”: 48
}
- The JSON string for Call Disconnect event is
{
“msgtype”: “event”,
“eventtype”: “disconnect”,
“referenceid”: 1,
“releasing”: “101”,
“uui”: “”,
“custdata”: “”,
“time”: 1428289136,
“callid”: 48
}
- The JSON string for Call Transfer event is
{
“msgtype”: “event”,
“eventtype”: “transfer”,
“referenceid”: 1,
“transferring”: “101”,
“transferred”: “102”,
“ucid”: “00001094861421138402”,
“uui”: “”,
“cusdata”: “”,
“time”: 1424044800,
“trunkgroup”: “10”,
“trunkmember”: “12”,
“primarycallid”: 123,
“secondarycallid”: 124,
“party1”: “101”,
“party2”: “102”,
“party3”: “”,
“party4”: “”,
“party5”: “”,
“party6”: “”
}
- The JSON string for Call Conference event is
{
“msgtype”: “event”,
“eventtype”: “conference”,
“referenceid”: 1,
“controller”: “101”,
“addedparty”: “102”,
“ucid”: “00001094861421138402”,
“uui”: “”,
“cusdata”: “”,
“time”: 1424044800,
“trunkgroup”: “10”,
“trunkmember”: “12”,
“primarycallid”: 123,
“secondarycallid”: 124,
“party1”: “101”,
“party2”: “102”,
“party3”: “”,
“party4”: “”,
“party5”: “”,
“party6”: “”
}
- The JSON string for Call Idle event is
{
“msgtype”: “event”,
“eventtype”: “idle”,
“referenceid”: 1,
“time”: 1424044800,
“extension”: “101”
}
Uninstallation
- Stop the Window Service ivrSVR
- Open Windows Command Prompt, enter the following commands to uninstall the program from Windows Service
- cd c:\program files\ivrsvr
- ivrSVR -u
Support and License